The S7000 is a great camera for macrophotography. It features two macro modes (normal macro and super macro).
Macro mode
The macro focus range is from 10cm to 80cm.
Super-Macro mode
Super macro mode the range is 1cm to 20cm. Although super-macro mode allows you to capture the smallest possible area, there are a few disadvantages:
- you need to get really close for high magnification (about 1cm away from your subject);
- the camera's internal flash does not work at this close range (indeed the bulk of the lens blocks the flash from illuminating the subject);
- there is significant distortion; and
- you cannot zoom in super-macro mode.
Macro lenses (filters)
Macro lenses offer an alternative to using the camera's macro or super-macro modes. Macro lenses are sometimes called "macro filters" because they look very similar to screw on filters and are threaded at both ends to allow stacking. In reality, they are not "filters" at all. They do not filter and are simply glass lenses similar to magnifying glasses.
Macro lenses are rated according to their magnification power using a diopter system. Common powers are +1, +2, +4 and +8. The higher the number, the greater the magnification.
Why?
Even on the S7000 with its macro and super macro modes, there are times when you will want to maintain some distance from the subject, but also achieve high magnification. Macro lenses give you this ability.
For example, using a +4 diopter macro lens you can capture an area 35mm x 27mm in size on the full telephoto setting from 200mm away from your subject. You could not capture an area this small using the camera's macro setting, and using the super-macro setting you would have to get within 15mm of the subject. For taking macrophotography of live insects it is often not possible to get within 15mm without scaring them away.
Out of interest, using the normal macro setting you can capture an area of about 60mm x 45mm from about 80mm away. This is alot less magnification and you need to be closer.
Stacking
Macro lenses can be stacked to increase the magnification available. For example, Hoya make a 55mm close up set that incorporates three macro lenses in +1, +2 and +4 powers. All three can be used simultaneously on the S7000 for a combined power of +7. Slight vignetting occurs with three macro lenses stacked at the maximum wide angle setting, but using macro lenses on anything other than full telephoto sort of defeats the purpose by losing you overall magnification.
Stacking the Hoya +4, +2 and +1 macro lenses allows you to capture an area about 24mm x 17mm in size at a distance of 140mm using the S7000 at full telephoto.
The stacking rule - when stacking macro lenses, always put the greatest value lens closest to the camera. eg. if you are using all three lenses in the Hoya set, screw the +4 on first, followed by the +2 and then the +1. This will reduce distortion and chromatic abberration.
Disadvantages
Like all things, there are no free lunches. Macro lenses have their disadvantages:
- the focusing range of the camera is greatly decreased - the higher the diopter the less focusing range the camera will have;
- distortion is increased;
- depth of field is reduced, the more powerful the macro lens the shallower the depth of field (this is not always a disadvantage because the shallower depth of field can help you to isolate your subject from the background - the "bokeh" that the digital SLR guys are always throwing in your face);

Example of limited depth of field +7 diopter (+4+2+1 stacked) - chromatic abberration is increased;
- it is something else to buy and screw on the front of your camera (and if you don't already have a 55-55mm extension tube, you will need to buy one of those as well).
Overcoming the disadvantages
There is not a lot you can do about the reduction in focusing range but good technique can reduce the inconvenience suffered - see the section on technique. The reduced depth of field is a problem if the depth of field is insufficient to have the whole subject in focus. Compensate by using a smaller aperture like f8. You may also have to use a tripod if your shutter speed ends up too low. However, if you can get your entire subject in focus, the reduced depth of field is a bonus by blurring the background nicely.
Distortion and chromatic abberration can be addressed using Helmut Dersch's Panotools and the right correction values. The hard part is finding those correction factors. Time permitting, over the coming weeks I will be updating this article with correction factors for the Hoya +1, +2 and +4 lenses at full telephoto on the S7000. If anyone has already done this, I would be grateful to hear of the parameters used.
Macrophotography technique with macro lenses
The technique I have used to good effect is as follows:
- select the macro lens based on the level of magnification required;
- zoom camera to full telephoto setting (but do not use the digital zoom if you are shooting smaller than 12M);
- set camera to manual focus and turn focus ring so that camera is at minimum focusing distance;
- move the camera in and out relative to the subject until the subject is in focus.
The last point is probably the most valuable. Normally, you are changing the zoom level to frame your shot and using the focus range to get it sharp. With macro lenses, you are adding/removing lenses to frame the shot and moving the camera in and out to get it sharp. The focusing mechanism of the camera does not give much range with macro lenses attached - typically with +4 or greater magnification the focusing range will be smaller than a couple of cm - meaning that you will have to move the camera to within this zone.
For example, if you have the +4 lens attached and the S7000 at full telephoto, you will need to be within 20cm +/- 1cm of the object for the camera to get focus lock. As a result, you are often better just selecting the minimum manual focus distance and moving the camera so that the focal plane (where the image is sharp) is exactly where you want it. Shutter response is also faster with manual focus and this can help with fast insects.
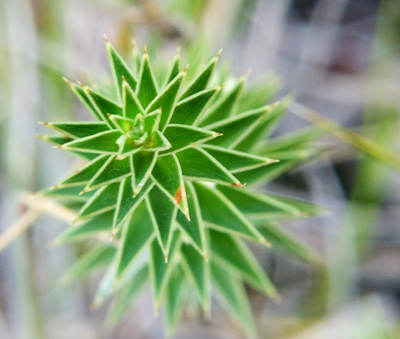
Limited depth-of-field
Macro photography involves a significant reduction in depth-of-field (DOF) compared to what you may be used to in non-macro photography. With digital cameras we all get a little spoiled with the huge depth of field normally available (getting everything in focus is not a problem). With macro photography, the higher the magnification, the less depth of field is available to the extent that you may often only be able to get a particular part of a plant or insect in focus.
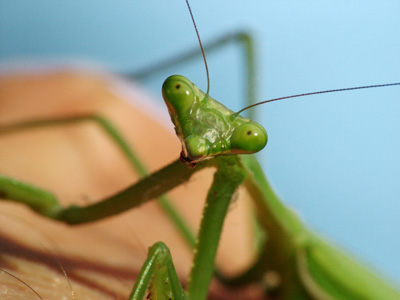
To counteract this you want to use the smallest aperture possible (f8 on most digicams), but to use such a small aperture you need lots of light otherwise exposure times will be long and movement of the camera or subject will cause problems. Even at f8, at high magnification your depth of field may only be 2-5mm, so if what you are taking a picture of moves (or the camera moves) by more than that as you press the shutter it will be out of focus.
The flash now works
As an added bonus, because macro lenses allow full telephoto macro photography, you can now use the camera's internal flash because you will be far enough back that the camera's lens does not shadow the subject.
Achromatic close-up lenses
One draw back with cheap close-up lenses is that they are made up of a single glass element, a bit like a magnifying glass. A single glass element will bend light of different wavelengths by different amounts. Consequently, you may experience chromatic aberration which increases the further away from the centre of the image.
Achromatic macro lenses are multi-element by design and are intended to all but eliminate chromatic aberration. For a list of presently available 2 element achromatic macro lenses see Greg Erker's webpage at www.angelfire.com/ca/erker/closeups.html.
Raynox also make two clip-on macro lenses: the DCR-150 and DCR-250. They are made up of 3 glass elements in 2 groups and dpreview contains a number of threads from happy users. Further information is available on the Raynox website: www.raynox.co.jp/english/dcr/dcr150/indexdcr150eg.htm and www.raynox.co.jp/english/dcr/dcr250/indexdcr250eg.htm.
Reverse mounting 35mm SLR prime lenses
You can also obtain sensational macro photography results by reverse mounting 35mm SLR lenses. The best choices for this are fast prime lenses (non zoom lenses) around the 50mm focal length. You will need a lens reversing ring that has a 55mm male thread on one end (to go into the Fujifilm 55mm extension tube) and male threads of the right size on the other end to screw into the filter threads of the prime lense.
Reverse mounting lenses has been a favourite trick of macrophotographers for a long time and very impressive results are possible. You will experience greatly reduced depth of field, increased distortion and possibly some chromatic abberration or vignetting depending on the focal length and quality of the lens you are reverse mounting.
Here is an example of a 50mm SLR lens mounted to a Canon Pro90IS - www.breezesys.f9.co.uk/g1/macro/#pro90.
Do-it-yourself (DIY) macro lenses
Lothman on dpreview has documented some excellent DIY macro lenses using things like:
- a reversed slide projector lens - forums.dpreview.com/forums/read.asp?forum=1012&message=5266276 ; and
- the end objective from a pair of binoculors - forums.dpreview.com/forums/read.asp?forum=1012&message=5354811 .
Homebrew / Do-it-yourself (DIY) macro projects
- make your own macro stand - www.edigitalphoto.com/tips_techniques/0011edp_camera/
- make your own macro ring light - several people have done this in different ways - see www.digi-darkroom.com/showthread.php?t=7451 ; users.pandora.be/cisken/LED_ringlight/LED_ringlight.html ; www.emling-online.de/digital/ringlicht2.html (in German). This guy has used optic fibres to redirect the camera's in-built flash into a ring configuration for macro work hem.passagen.se/birchs/TTL_ring_flash/
More information
- Macrophotography.org - the name says it all - www.macrophotography.org/
- What bug is that? - check out bugbios - the "entomological database of very cool bugs" - www.insects.org/entophiles/
An excellent site with general information about digital camera macrophotography by Hector Niam. Hector uses a s602z some almost everything he says is applicable to the S7000 (the only real difference is the lack of f11 on the S7000 - f8 max) - azone.clubsnap.org/insectguide/page01.html