After the success of my quickly cobbled together saddle pack on a recent bike tour, I decided to build a proper saddle pack from the ground up that would work for carrying my Stratospire 2 tent on the back of my bike.
Bits and pieces
- 500D outdoor waterproof cordura;
- 25mm (1") webbing;
- 25mm (1") side release clips and buckles;
- some grosgrain for tie-outs.
Process
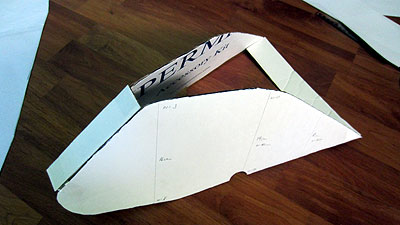
- make a cardboard template to get seat angle, seat post length and tyre clearance right;

- prototype side panels in cardboard and assemble "3d" model;
- produce pattern for top and bottom of bag;

- work out the sewing order;
- build prototype out of Tyvek and test;
- refine and build final version.
Sewing order
- prepare grosgrain tie-outs by tacking ends together;
- pin tie-outs to side panels;
- stitch side straps;
- pin side straps to side panels;
- stitch narrow end of top and bottom panels together (if not cut from one piece);
- stitch webbing to combined top/bottom panel;
- stitch one side panel in starting with tight curve on front-most point of panel and doing top edge - make sure tie outs are in place;
- stitch other side panel starting with tight curve on front-most point of panel and doing top edge;
- stitch bottom edges of side panels;
- add half buckles to end closure webbing and stitch together;
Sewing Notes
- needle used: 14/90;
- thread used: Mettler "extra stark";
Prototype
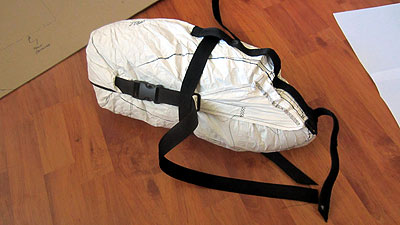
Building the prototype out of Tyvek taught me a few things:
- my original method of locating the roll top tensioning straps didn't work that well on the bike and made the bag cumbersome to get on and off;
- the webbing that locates the tie-on straps should go all the way over the top and round the bottom to give the most compression options for different loads;
- side stiffeners are not necessary if carrying just the tent, but made out of flexible cutting board they weigh very little and do mean that you also have a couple of cutting boards along;
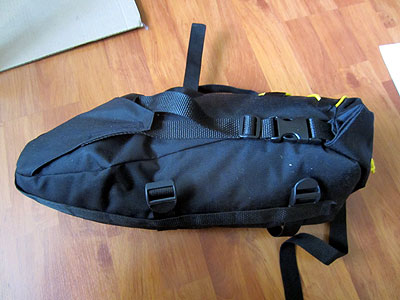
Final version
This time out of 500d denier:
- side view with tent inside;
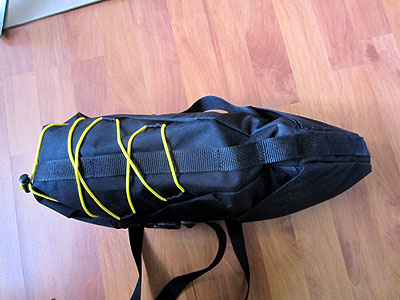
- top view with tent inside;
- side view empty;
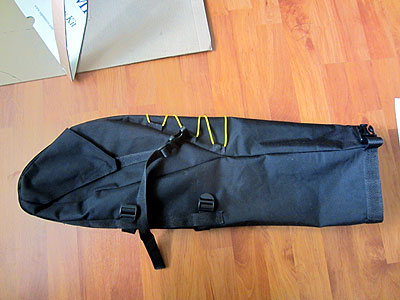
- top view empty;
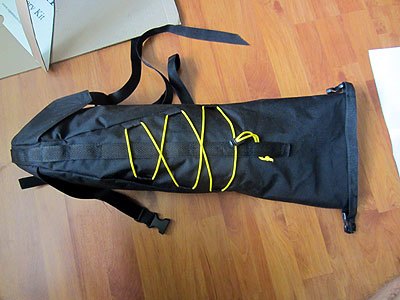
- weight - 185g;
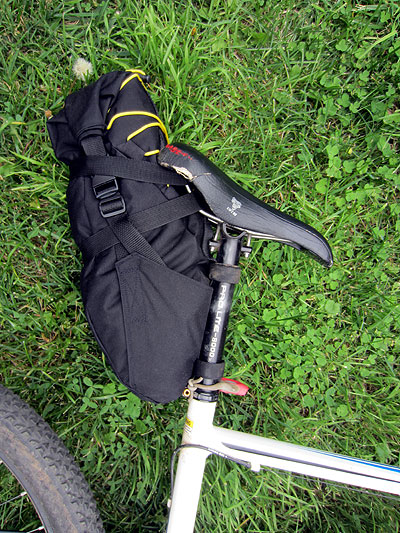
- on the bike;
Design goals and principles
One of the key ultra-lightweight camping principles is to design gear to have multiple uses. For the saddle pack, this principle was pursued as follows:
- saddle pack itself replaces the tent's stuff sack;
- straps used on saddle pack are removable so can be used on other things in an emergency or left on the bike when carrying the tent;
- straps can be positioned anywhere around the pack allowing you to decide on the most secure configuration depending on the pack's contents;