There's not alot of space for a frame bag in the main triangle on the Giant Anthem X (especially if you want to keep your water bottle). I made this bag to take up as much space in the frame as I could spare without fouling the water bottle or suspension.
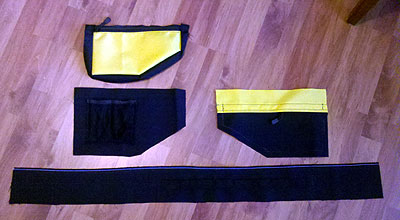
A frame bag comprises three basic parts - a left and ride hand side and a piece of fabric that wraps around the outside that holds the two sides together.
I made this frame bag as follows:
Step 1 - template
I used a piece of cardboard held up to the frame to trace out a template of the space where the bag would go.
Step 2 - the wrap
I used 1000D cordura for the 'wrap' piece. To secure the bag to the frame I used some 25mm webbing stitched to the wrap piece. I cut this piece 9cm wide which allowing for a 1cm seam would give me a 7cm wide frame bag. I cut this piece much longer than needed so I could be sure there was enough to wrap around the outside of the frame bag when stitched together. Cutting this piece to length was almost the last thing I did.
Step 3 - sides
Using my template I traced out the two sides. For this I used some black 500D cordura. The sides are not subject to abrasion like the wrap piece so 1000D is a bit overkill.
Step 4 - prepare right side panel
On the right hand side I decided to add a pocket with an internal mesh divider to keep some smaller items secure. I stitched the internal mesh pocket to the outside face of the side panel.
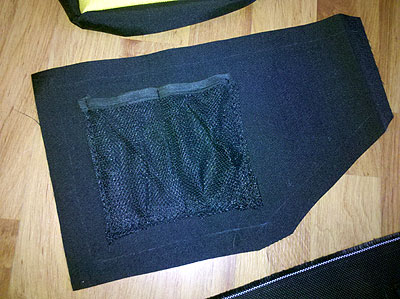
I then made the outside of the pocket from a piece of 500D cordura (yellow this time to add a bit of colour). This piece is smaller all round than the side panel and has a zipper at the top along with a 20mm strip black 500D cordura all round to give it some room for expansion.
I then stitched the side pocket outer panel to the right side panel.
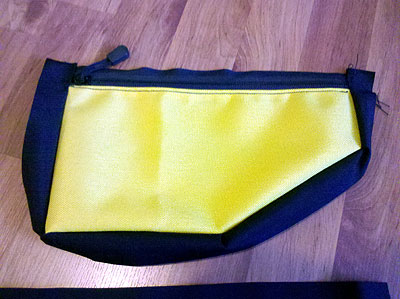
Step 5 - left hand side
This side panel has the zipper to access the main compartment and is made of two pieces of fabric. A piece of yellow 500D cordura above the zipper (which actually extends a little over the zipper like a bit of a rain flap) and a bottom piece of black 500D.
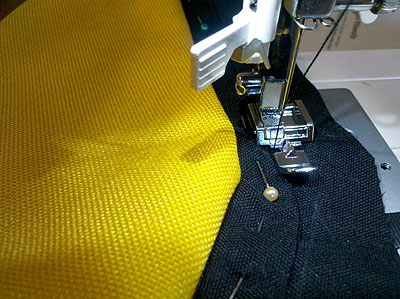
Step 6 - stitch the bag together
I completely assembled the bag inside out using pins and clips before I did any stitching. This way I could be sure everything would come together properly. The bag's got some tight corners and it makes the stitching easier when you fold these and hold them in place with bulldog clips.
I don't think it really matters which side you stitch together first but start stitching where the wrap piece starts.
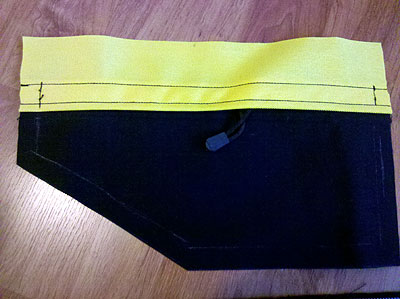
Step 7 - finish the wrap piece
Once I had both side stitched on, I then cut the wrap piece, stitched its ends together and overstitched the side seams around this join.
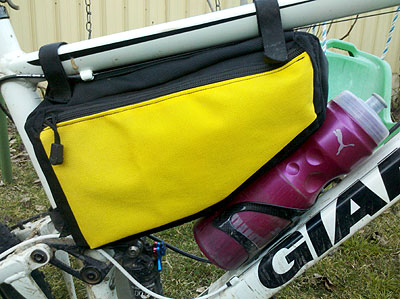
Finished bag
Right hand side:
Left hand side:
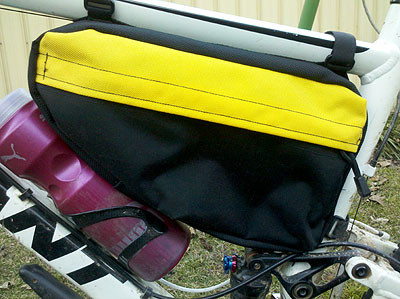
Total volume is about 3.3L and weight is 154g including three velcro straps.
In use
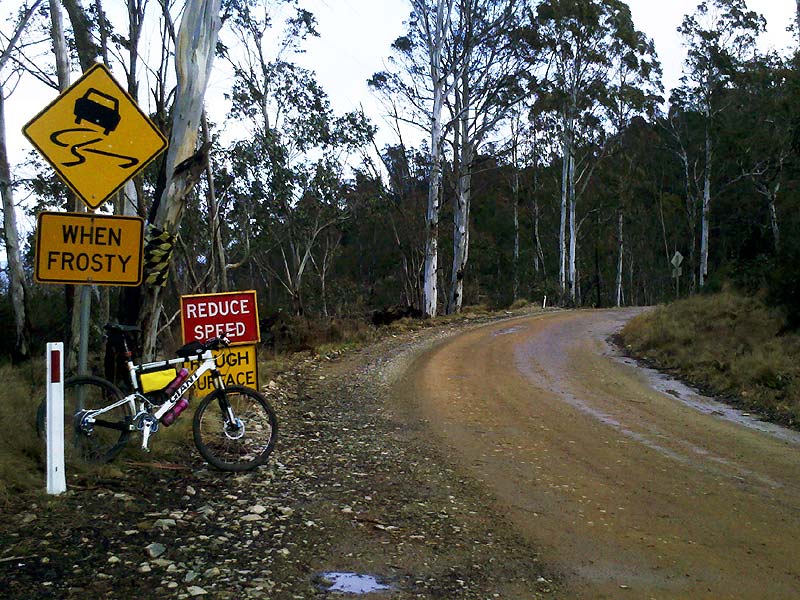
The frame bag has been great. I've used it on longer rides where I need to carry extra clothes and food. Using the frame bag means I don't need to carry a camelback which saves on weight and increases comfort.
On my last ride, the bag easily swallowed my goretex riding jacket, overpants, med kit and food.
More use
I've been experimenting a little recently with what to best carry in the frame bag. It easily swallows my ultralight ti cooking system , plus mug and food for a day trip.
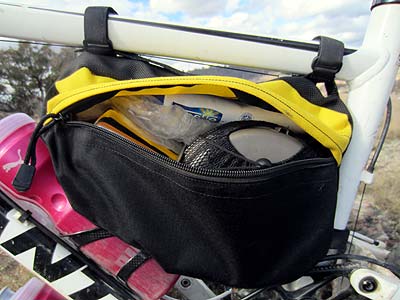
In the past, I'd take a pack for this sort of stuff, but its nice to be able to fit this on the bike:
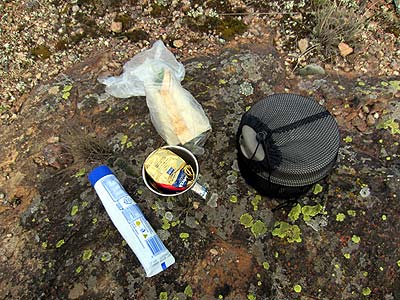
It's also nice to stop for a lunch-time fry up and a coffee: