My daugther's 24" FS bike came with a Suntour SR coil spring fork. The spring rate was quite good for my daughter's weight but the fork had no noticeable damping and was almost 2.1kg. That's pretty heavy for a 50mm travel fork.
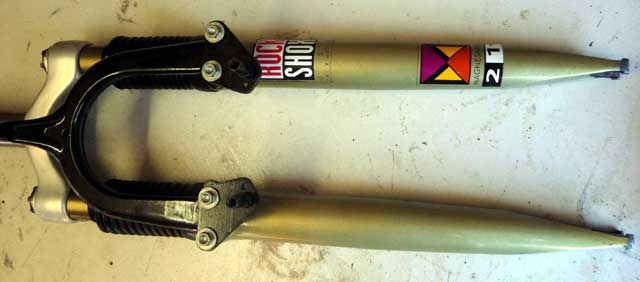
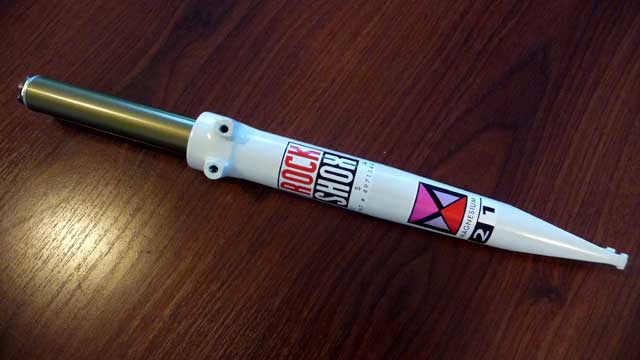
A scrounge round in the parts box revealed an old pair of Rockshox Mag21 forks. I took these off a 96 GT Karakorum that a guy around the corner from me was throwing out. 1996 was probably the last year that they made the Mag21.
The stock Mag21 was a 46mm travel air sprung oil damped fork that weighs about 1450g. A perfect replacement for the Suntour SR fork BUT the brake bosses are in the wrong place! Even though the Mag21 is a 26" fork and the Suntour SR a 24" fork, the Mag21 has a 10mm lower axle to crown distance than the Suntour SR. I suspect that Suntour just make a 26" fork and then weld (all steel lowers) the brace/brake boss piece 25mm lower to produce this 24" fork.
Move those bosses
The only way to get this fork to work is to lower the brake bosses by around 25mm. The standard boss doubles up as one of two retaining bolts for the fork arch. The bolt on arch and the straight fork lowers meant that there were four possible ways to solve this problem:
- use a modified Mavic 700c v-brake adapter plate;
- machine up a complete new brake arch with lower brake bosses;
- machine up seperate clamp on v-brake bosses; or
- make up some brackets to bolt to the existing brake arch bolts and lower the brake bosses.
After a bit of analysis and naval gazing I decided to go with option 4 - bolt on brackets. Option 1 seemed like too much agro - LBS didn't know if/when/where they could order the Mavic adapter and no-one overseas seemed to be willing to ship Mavic stuff outside of their country. Option 2 (completely new fork arch) was looking good until my materials analysis from the 3D CAD software showed this was going to be heavy without lots of intricate machining. Option 3 (clamp on brake bosses) was lots of machining again and I was unsure whether the clamping force I'd need to hold the bosses securly would force the fork outers in and cause binding.
Bolt on brackets
Make it out of steel or aluminium? I could have used either, but by using 3mm steel plate it kept the fork arch to boss distance closer than having to use thicker (maybe 5-6mm aluminium plate).
Making the brackets was pretty straight-forward. If you're careful and methodical they can be made up with a minimum of tools. For the purposes of this exercise, I got the kids involved and neither the mill or even the drill press was used.
The only tools used were:
- verniers;
- scribe;
- center punch;
- bench vise;
- hacksaw;
- cordless hand-drill, 6mm and 2mm drills, counter-sinking bit;
- flat file
The big tip for making these brackets is that you are making two and they are the mirror image of each other. So cut two bits of plate (or lengths of flatbar). Mark all of the holes on one and then clamp them together to drill all of the holes. Then use some appropriate bolts to bolt the two pieces together and finish the outside however you like it. I used a hacksaw to cut away the excess metal and a flat file to finish off the edge. My kids got to learn a little bit about the right way to center punch, hand-drill and hacksaw.
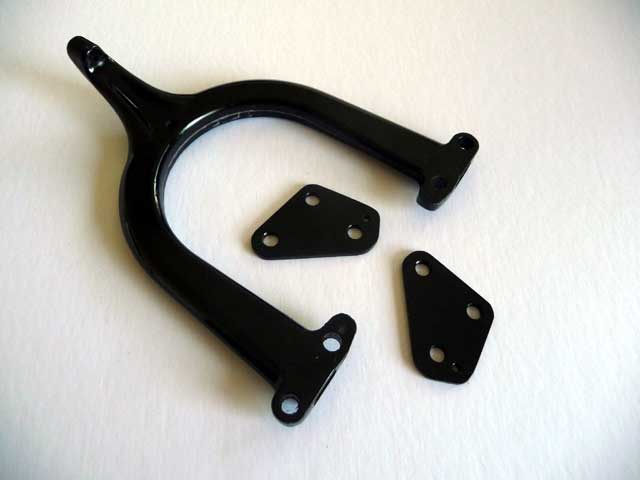
Modifying the fork brace
The rockshox fork brace has raised bosses where the brake bosses were. These need to be cut off flush with the main surface of the brace. Cut these off carefully with a hacksaw as the bits we cut off can be used on the lowered brake bosses later (I didn't know this at the time, lucky I didn't just put this in the mill and machine the bosses off like you normally would.
Putting it all together
Once the brackets are done, give them and the brace a fresh coat of paint (gloss black in my case) and then put it all together.
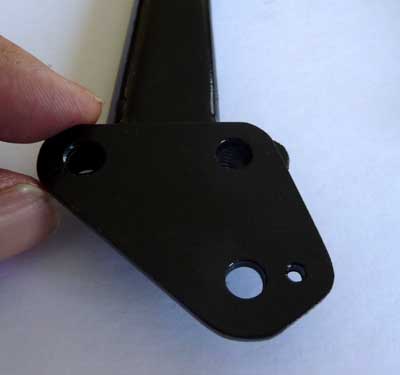
Bolt the brake bosses onto the brackets before putting them onto the fork. As it happened, with the v-brake arms that I was using on the bike I had to space the brake bosses out a little from the brackets so that the arms would not foul the attachment bolts.
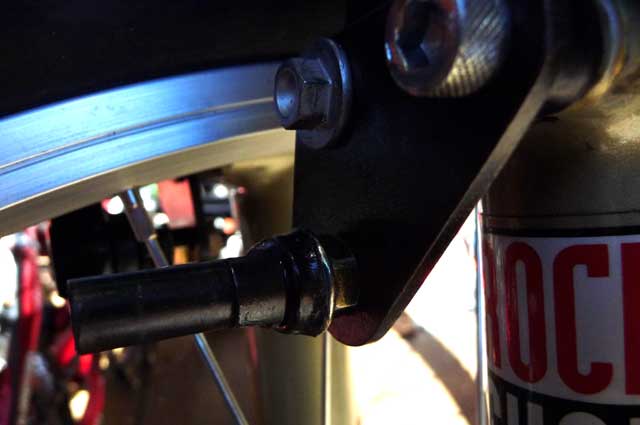
Its a bit hard to see in the above picture, but I've re-used the brake bosses that come with the forks. The brake boss has a fairly long thread (about 20mm) and to assemble onto the bracket I first put on the cut off boss from the fork arch, then a nut to lock that in place (it contains the hole for the v-brake tensioning spring), then the bracket and then a nut at the back to hold it all together.
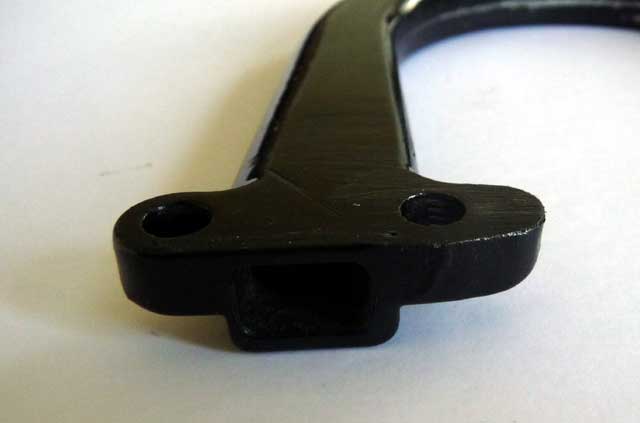
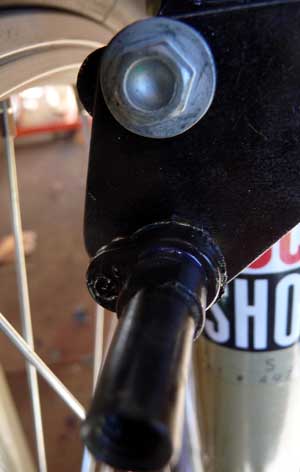
Here's another view of the assembly:
Although made out of mild steel. these brackets only added 52g to the weight of the fork. Final all up weight of the fork was 1480g.
How do they work?
In a word, great! Breaking power seems unchanged, indeed its a little greater because the boss position on this fork allowed me to lower the brake pads in the arm slots a few mm so there's more leverage.
Locking the brakes on and rocking the bike back and forward shows no perceptible flex of the bracket and very little flex at the tips of the brake arms.
Fork setup
For a 35kg rider I found the following settings to be really excellent:
| Fork oil | Silkolene RSF Pro 5W |
| Oil height | 60mm |
| Air pressure | 18psi in each leg |
Further mods
I'd like to replace the mish-mash of bolts I used to secure the brace with some nice large rounded button head bolts. That should neaten things up a bit.
Update
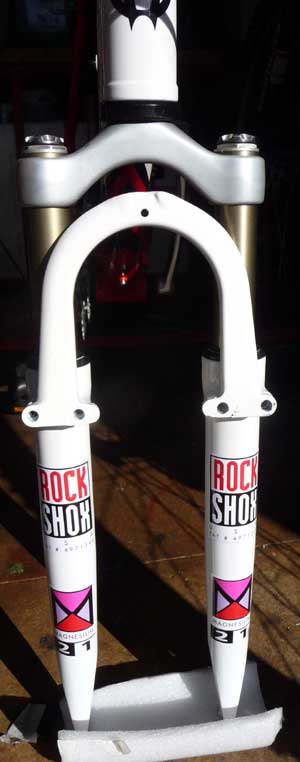
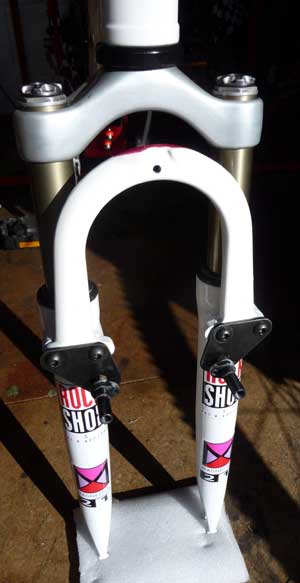
It seems that colours and colour matching matters a little more to daughters than I thought. So we now have all white lowers with suitably tweaked stickers:
Ultra-light version?
If you're a total weight weenie then it may be possible to remove all of the damping internals from one of the legs (and probably remove most of the oil as well). I'm not sure how much weight this might save, perhaps around 200-300g.
Don't be an idiot
This page explains what I did (but not exhaustively) to get a Mag21 26" fork working with 24" wheels. This is not a manufacturer intended use for this fork. If you want to copy what I did then you do so entirely at your own risk. The mods involve forks and brakes. Such modifications can lead to personal injury or death. Use this information at your own risk. If you don't know what you're doing and/or can't satisfy yourself as to the safety of any particular modification then don't do it.
More Pictures
 | Almost ready to bolt back together: |
 | All back together now |
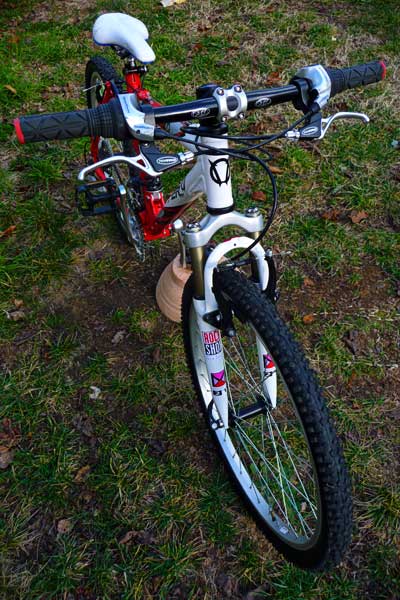 | On the bike |