Special thanks to "Bad Mechanic" and his "Ghettotastic" method for removing/adding/changing the All Travel Spacer in the SID 2009/2010 forks with 32mm stanchions.
The photos in this FAQ are of a SID Race 2009 but I understand from looking at the part numbers that the dual air spring is the same model/configuration across all of the SID 2009/2010 forks.
Disclaimer
If you follow this guide and stuff your fork or hurt yourself then its your own fault. If you don't know your way around suspension components or are otherwise a ham-fisted git then get this procedure done at your local bike shop.
Step 1 - Cleanliness is next to godliness
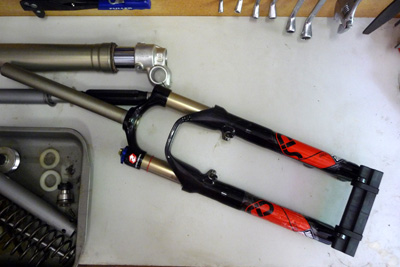
Make sure your forks are nice and clean. You don't want to get any dirt inside the forks. Thankfully the ones in the photo are brand spanking new so no need for a clean-up.
You do not have to remove your forks for this procesure although it may make it a little easier. If you have a bike mechanic stand where you can clamp the bike and rotate the forks so the stantions are horizontal then this will make things alot easier with the forks still on the bike.
Step 2 - Let all the air out

Always let all the air out of any air forks/shocks before you do anything to them. Anyone who's had their Fox RP2 shock get stuck down because of leaking seal and who has then had to open it under pressure knows the explosive power that's lurking inside even with only 100psi :).
Anyway, for the SID with dual air pistons you need to let the air out of the top schrader valve (+)air spring and the bottom schrader valve (-)air spring.
Step 3 - Remove the air spring top cap
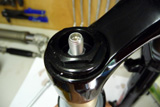
Use a 24mm open ended spanner or a suitable adjustable wrench to take off the air spring top cap. There may be some lubricating oil in the positive air spring chamber. On this new fork there was no oil, just a small amount of red grease reside on the seal head.
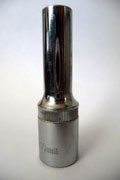
Step 4 - Remove negative air stem retaining nut
To remove negative air stem retaining nut you will need a deep 10mm socket. Undo the retaining nut until it is flush with the end of the air stem.
With the socket still on the retaining nut, give it a gentle tap with a rubber mallet to unseat the rod from the bottom of the fork. The retaining nut is aluminium and only has threads near the hex end so take extra care not to undo it past the end of the rod otherwise you may damage its threads when you give it a tap.
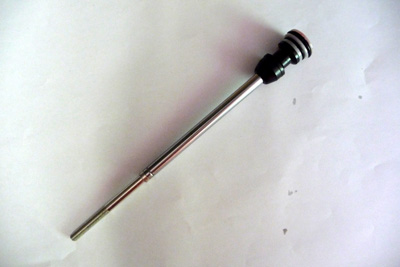
Step 5 - Push the air spring rod out of the fork
You need to find a suitable rod to push the air spring rod out of the fork. The rod can be no larger than 7.8mm in diameter. Take special care not to damage the bottom rod seal. It is a small black plastic washer that the negative air stem retaining nut clamps to the bottom of the fork leg and stops the lubricating oil for the negative air spring from leaking out the fork. The seal washer is picture below. Don't loose it.

Step 6 - remove the spacer (or add it)
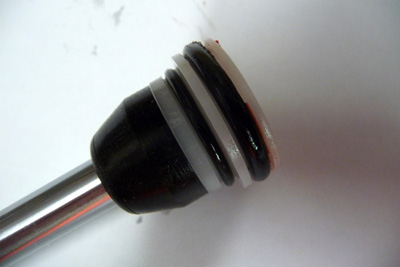
The picture below shows the air spring rod / sealhead assembly out of the fork.
Here's a close up showing the rubber top out bumper, the spacer and at the top the air piston seal head.
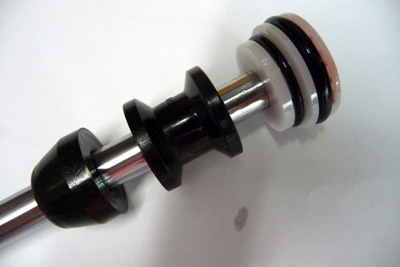
To remove the travel spacer, slide off the rubber top out bumper and then slide off the travel spacer.
For those who want to reduce their 100mm SIDs to 80mm and want to make their own spacer, the dimensions are as follows:
- diameter - 23.5mm;
- inner diameter - 10.3mm;
- height - 19.9mm.
The spacer is made of some sort of hard black plastic and weighs about 6g. For the weight weenies out there this part could probably be made a little lighter out of aluminium.
Its clear from the design of this part and the fork itself that you could make up spacers of different heights to really fine tune how much travel the fork had.
If you want to order the all travel adjust spacer from Rockshox then the part number is 43-4015-032-010.
Step 7 - reassembly
Put the rubber top out bumper back on the rod and slide it up to the seal head. Make sure everything is free from any dirt and lubricate the o-rings in the seal head with fork oil.
Step 8 - put the air rod back into the fork
- Update 20/5/2012 - see "Step 8 - an easier way" below
Check that the inside of the fork is free of dirt. You can give it a quick rinse with some fork oil. Lubricate the air rod nicely with some more fork oil and insert it back into the fork the way it came out. Once the seal head is just inside the fork, lay the fork horizontal on the bench and using a syringe with a needle or hose on the end, squirt 5ml of 15w fork oil into the hole at the bottom of the fork where the rod comes out. By keeping the fork horizontal the oil will not run back out the hole.
Then use a blunt kleen instrument to push the air rod into the fork all the way so that you can screw the rod retaining nut back on. You can use a reversed plastic handle screw driver to do this. Insert it into the fork handle first so it pushed on the seal head. Now invert the fork off the side of your bench and use the bench to push on the screwdriver blade. You should be looking from above and as you push the seal head in the rod will come out the hole in the bottom of the fork towards you. Put the seal washer back on (the one you carefully put aside at step 5) and screw the retaining nut back on. Torque to 65in-lb.
It is very important not to damage the bore inside the fork - its what the air spring seals against. If the above explanation does not make sense then figure out some way of your own to do it without damaging the bore with a sharp metal object. Under no circumstances push on the seal head with the end of a screwdriver or some other metal rod.
Step 8 - an easier way
Mtbr legend 'Bad Mechanic' shot me the following PM giving an very sweet way to do step 8:
- "Once the piston is back inside the stanchion, go ahead and put the 5ml of oil in the air chamber (I prefer at least 80w synthetic gear oil over the 15w - heavier the better) and reinstall the top cap. Then invert the fork, compress about half way, and fill the bath oil (I prefer 15ml of bath oil instead of the stock 5ml which in my opinion isn't enough). Then attach your shock pump to the positive and slowly start to inflate. As you're inflating it, guide the negative valve back out the bottom of the leg, and once it's out, go ahead and inflate it up to about 60 psi. You can then reinstall the washer and foot nut and the air pressure will keep negative valve from spinning. I've found this to be faster, easier, and doesn't risk damaging the inside of the stanchion."
Step 9 - oil and cap
Put 5ml of 15w fork oil into the top of the fork and put the positive air spring top cap back on. Lubricate the o-ring on the top cap with some fork oil for good measure and make sure the o-ring is sitting properly on the cap.
Step 10 - reinflate and check
Reinflate the positive air chamber, reinflate the negative air chamber and do a final check that everything is properly tightened and back where it belongs.